

Why Bathroom Vanity Installation Transforms Your Space
Bathroom vanity installation is a high-impact upgrade that can turn a dated bathroom in Margate, Boca Raton, Miami, Deerfield Beach, Delray Beach, or anywhere in Broward County into a modern showpiece. This beginner-to-intermediate task can take from an hour to a full day, depending on what you find behind the old cabinet.
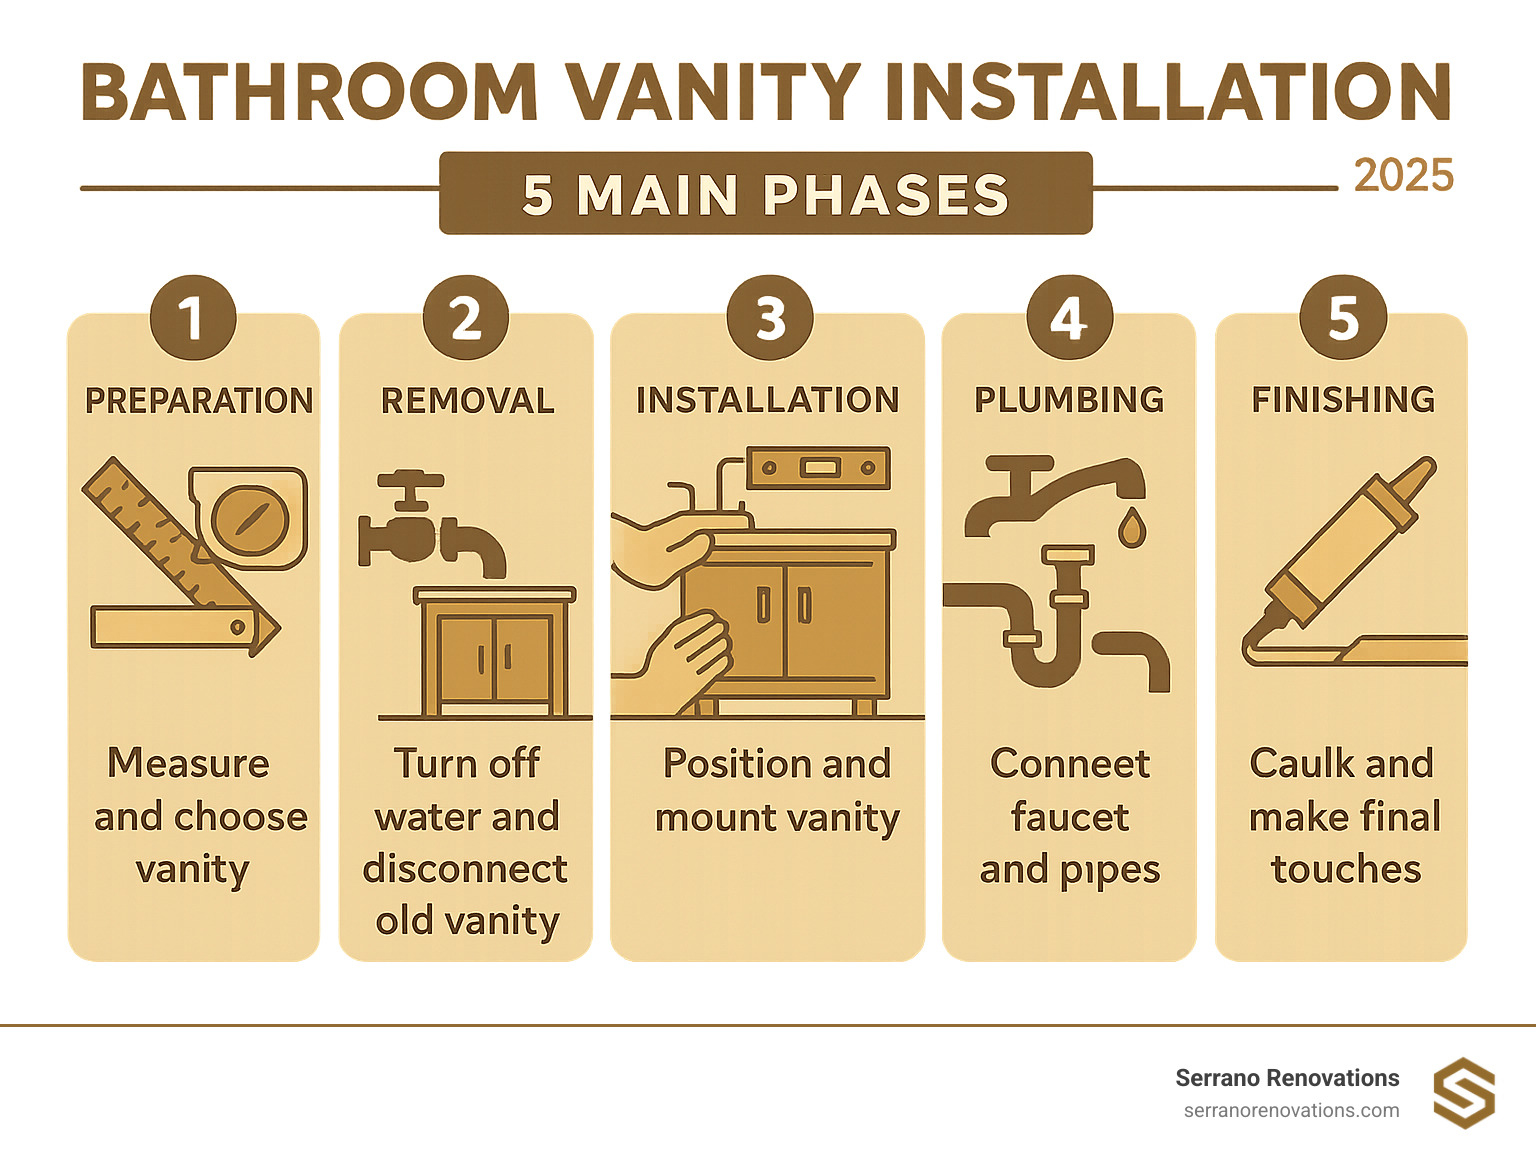
Quick Answer: Essential Steps for Bathroom Vanity Installation
- Preparation – Measure space, gather tools, choose the right vanity
- Removal – Turn off water, disconnect plumbing, remove old vanity
- Installation – Position new vanity, level it, secure to wall studs
- Plumbing – Connect water supply lines, install P-trap, attach faucet
- Finishing – Test for leaks, apply caulk, complete final touches
A new vanity instantly updates the room, adds storage, and boosts resale value—one expert calls it “the simplest way to refresh a bathroom.”
Costs vary with scope. In South Florida, professional labor for a straight swap averages $100–$200, while custom units or plumbing changes can raise labor to $500–$1,500. DIY eliminates those charges but requires basic plumbing confidence.
The roadmap below guides each phase so you can achieve professional-looking results.
Find more about Bathroom vanity installation:
Phase 1: Pre-Installation Prep Work
Choosing the Right Vanity for Your Space
Choosing your vanity is like picking a new car—it must fit your space, match your style, and work for your daily routine. Getting this right from the start saves you headaches and money.
Bathroom vanity installation success starts with understanding your three main options. Freestanding vanities are the most popular choice for DIY projects because they’re forgiving and straightforward to install. Wall-mounted vanities create that sleek, modern look while making your bathroom feel more spacious – perfect if you’re tired of stubbing your toe on cabinet bases. Corner vanities are the unsung heroes of small bathrooms, tucking neatly into tight spaces while still providing essential storage.
Pro tip: choose a vanity similar in size to your existing unit. This helps you avoid the nightmare of rerouting plumbing, which can turn a weekend project into a week-long ordeal.
Vanity sizes typically range from 18 inches wide (perfect for powder rooms) up to 72 inches for master bathrooms. When measuring, remember you need comfortable walking space around the vanity – nobody wants to squeeze sideways past their bathroom cabinet every morning.
Storage needs vary dramatically from person to person. If you’re sharing the space, built-in drawer organization can be a relationship saver. Think about your daily routine: do you need space for hair tools, makeup, or multiple people’s toiletries?
For aesthetic style, focus on the counter and overall shape since hardware can always be swapped out later to match your evolving décor. This flexibility means you don’t need to find the “perfect” handles right away.
If you’re working with limited square footage, our Small Bathroom Renovation Solutions guide offers clever strategies for maximizing functionality without sacrificing style.
Essential Tools and Materials Checklist
Nothing derails a DIY project faster than a mid-installation tool run. Let’s make sure you’re properly equipped before starting.
Your measuring arsenal should include a tape measure, a level (at least 24 inches long), and a stud finder. Don’t forget a pencil for marking – you’ll be doing more marking than you might expect.
Power and hand tools form the backbone of your installation kit. You’ll need a drill with various bits, a screwdriver set, both an adjustable wrench and a pipe wrench, a sharp utility knife, and a caulking gun. Keep a hacksaw handy in case you need to trim pipes.
Safety equipment isn’t optional – protect your eyes with safety glasses, your ears with ear protection when using power tools, and your hands with work gloves.
Materials include your new vanity and sink (often sold separately), plus the faucet which almost always requires a separate purchase. You’ll need a P-trap kit, water supply lines (braided lines work best), wood shims for leveling, silicone caulk, wall anchors, and 3-inch drywall screws for securing to studs. Don’t forget plumber’s putty and plumber’s tape.
Cleanup supplies make the difference between a professional-looking job and a mess. Have a bucket ready for catching water, plenty of rags and towels, and drop cloths to protect your flooring.
Measuring and Marking Your Space
Accurate measuring prevents the heart-sinking moment when your new vanity doesn’t fit. Let’s get this right the first time.
Start by measuring the width of your installation area, then check the depth to ensure you’ll have adequate clearance from the opposite wall or other fixtures. Nobody wants to find their vanity blocks the toilet door after it’s already installed.
Height considerations matter more than most people realize. The top of your washbasin should sit between 85cm and 92cm from the floor – this industry standard ensures comfortable use for most people without creating back strain.
Next, locate your plumbing connections. Mark the positions of both water supply lines and the drain pipe on the wall. These measurements will need to be transferred to your new vanity for cutting access holes, so accuracy counts here.
Use your stud finder to locate and mark wall studs with pencil. This step is absolutely critical because your vanity must be secured to studs for safety and stability. A vanity that’s only attached to drywall is an accident waiting to happen.
Mark everything clearly – you’ll be referencing these marks throughout the installation process, and clear markings prevent confusion when you’re juggling multiple steps.
Phase 2: Safely Removing the Old Vanity
This is where your bathroom vanity installation project gets real. Removing an old vanity might seem straightforward, but taking your time here prevents water damage and makes the installation phase much smoother. Think of this as controlled demolition – you want everything out safely without creating extra work for yourself.
Shutting Off Water and Disconnecting Plumbing
Water shut-off is your first and most important step. Look under your sink for individual shut-off valves – they’re usually located where the water lines come out of the wall. Turn these clockwise until they stop completely. No valves visible? Don’t panic. You’ll need to locate your main water supply and shut it off there instead.
Here’s a helpful tip we’ve learned from countless projects: once the water is off, turn on both faucet handles to relieve pressure in the lines. This simple step prevents that surprise spray of water when you start disconnecting things.
Place a bucket under the sink area before you start disconnecting anything. Trust us on this one – even “dry” pipes have water hiding in them. Disconnect the supply lines from the faucet first, using an adjustable wrench. Hold those lines upright and dump any remaining water into your bucket.
The P-trap (that U-shaped pipe under your sink) comes next. Loosen the slip nuts on both ends and remove it completely. This trap typically holds water, so have that bucket ready. Once it’s out, stuff a rag in the drain opening to keep sewer gases from escaping into your bathroom.
Detaching the Countertop and Cabinet
Time to cut the sealant that’s holding everything together. Use a sharp utility knife to slice through any caulk where the vanity top meets the wall. Work slowly and carefully – you don’t want to gouge your wall and create extra repair work.
Most vanity tops are held in place by clips underneath or construction adhesive. If you find clips, remove them with a screwdriver. For adhesive-mounted tops, a pry bar or putty knife becomes your best friend. Gently work the tool under the countertop, tapping lightly with a hammer to break the adhesive bond.
Remove the screws that attach the cabinet to the wall – these are usually found along the back rail of the cabinet. Once all fasteners are out, carefully detach the cabinet from the wall.
Here’s where having a helper really pays off: lift the countertop with assistance if it’s heavy stone or solid surface material. Your back will thank you later. With the top safely removed, the cabinet base should pull away from the wall easily.
Don’t forget about proper disposal of your old vanity. Many communities have specific requirements for construction waste, so check your local guidelines.
Preparing the Wall and Floor for Installation
With the old vanity out of the way, clean the area thoroughly. You’ll likely find dust, old caulk residue, and maybe a few surprises that have been hiding behind your vanity for years.
Scrape away old caulk from both the wall and floor surfaces. A plastic scraper works well for this without damaging your surfaces. Patch any drywall holes with spackling compound, let it dry completely, then sand smooth. If the wall needs repainting, now’s the perfect time to do it – much easier than trying to paint around your new vanity later.
Check that your floor is level using a long level. Small irregularities are normal and can be handled with shims during installation. However, if you find major floor issues, address them now before moving forward.
This preparation work might seem tedious, but it’s what separates a professional-looking installation from a DIY project that screams “amateur.” Taking time to properly prepare your space ensures your new vanity will look like it belongs there.
The Core of the Project: Your Bathroom Vanity Installation
A Guide to Proper Bathroom Vanity Installation
Here’s where the real work begins. Position your new vanity in the installation area, aligning it with those pencil marks you made earlier. Don’t stress about perfect positioning just yet – think of this as a dress rehearsal before the main event.
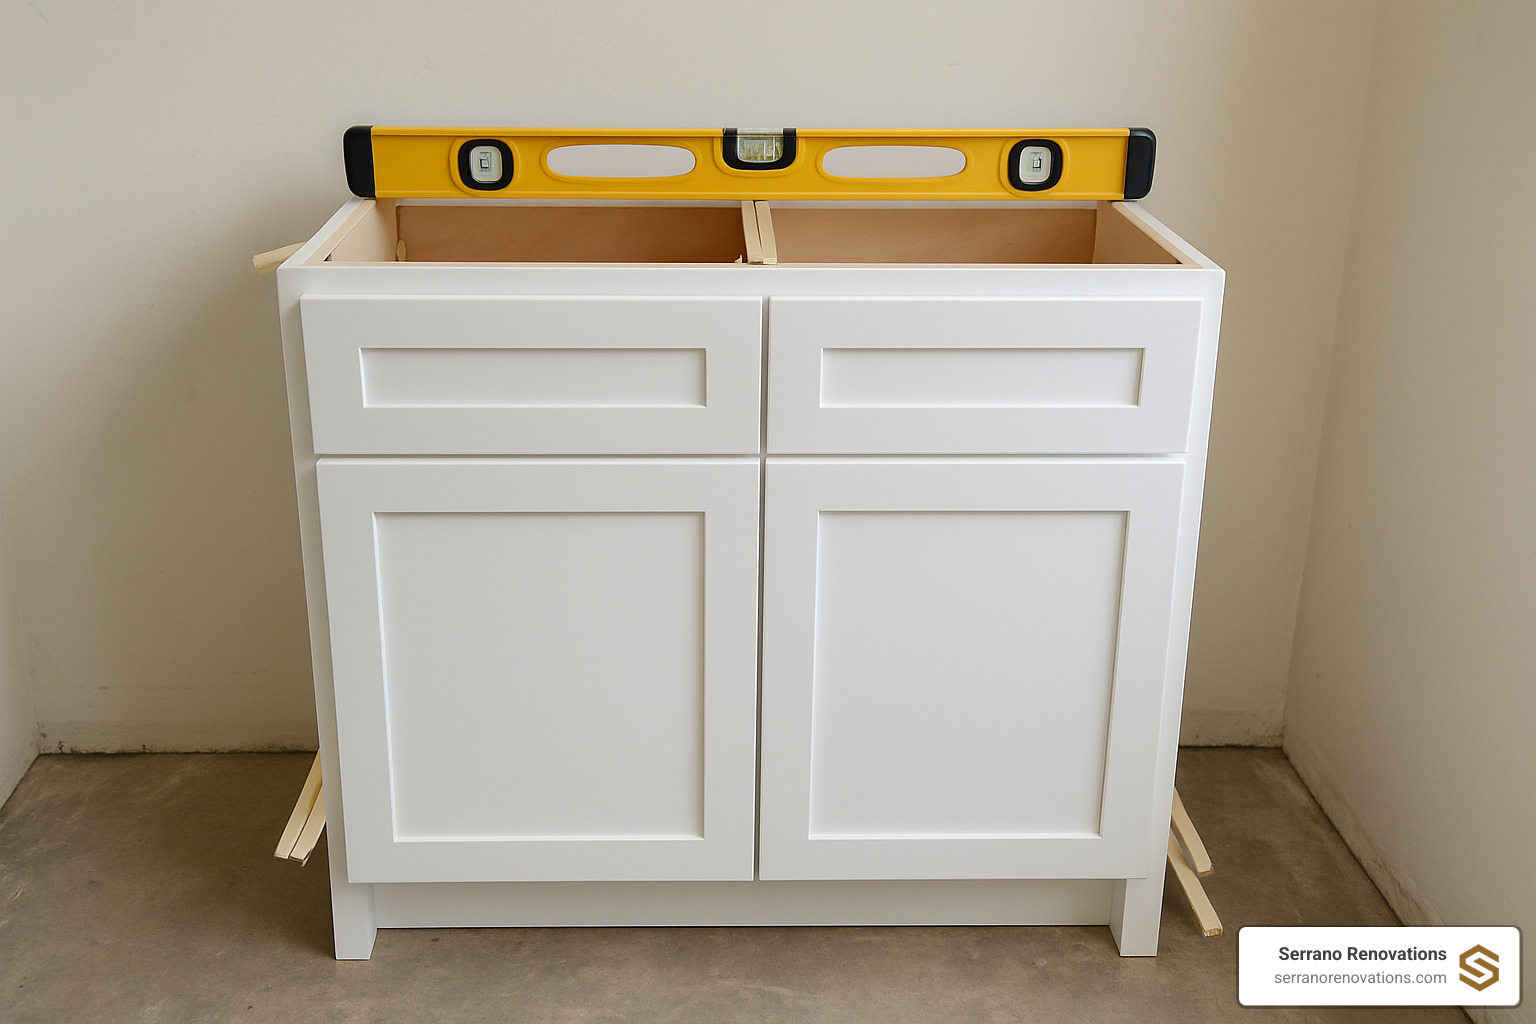
Now comes the reality check that catches many DIYers off guard. Check the vanity for level in both directions using your level. Here’s the truth: few floors and walls are perfectly level, so you’ll almost certainly need to make adjustments.
This is where shims become your best friend. Place shims under the vanity feet to level the unit. As one seasoned contractor puts it, “Not all floors or walls are level. Walls tend to curve in towards the corners because more drywall mud is needed there to cover the drywall tape.” This means you might need different shim thicknesses on each side – and that’s completely normal.
Once your vanity is level, check that it sits square to the walls. Small gaps between the vanity and wall are common and can be handled with trim or caulk later. The goal is getting everything plumb and stable.
Cutting Openings for Plumbing
Time to make your vanity work with your existing plumbing. Measure the exact locations of your drain and water supply pipes on the wall, then carefully transfer these measurements to the back of your vanity. Mark these locations clearly with a pencil – precision here saves headaches later.
For round pipes, a hole saw attachment on your drill creates clean, professional-looking openings. Here’s a pro tip: cut the holes slightly larger than the pipe diameter. This gives you wiggle room for adjustment and makes the installation process much smoother.
The drain opening often requires a different approach. You may need to cut a notch in the bottom of the vanity using a jigsaw. Start by drilling pilot holes at each corner of your marked cutout area, then connect them with your jigsaw cuts.
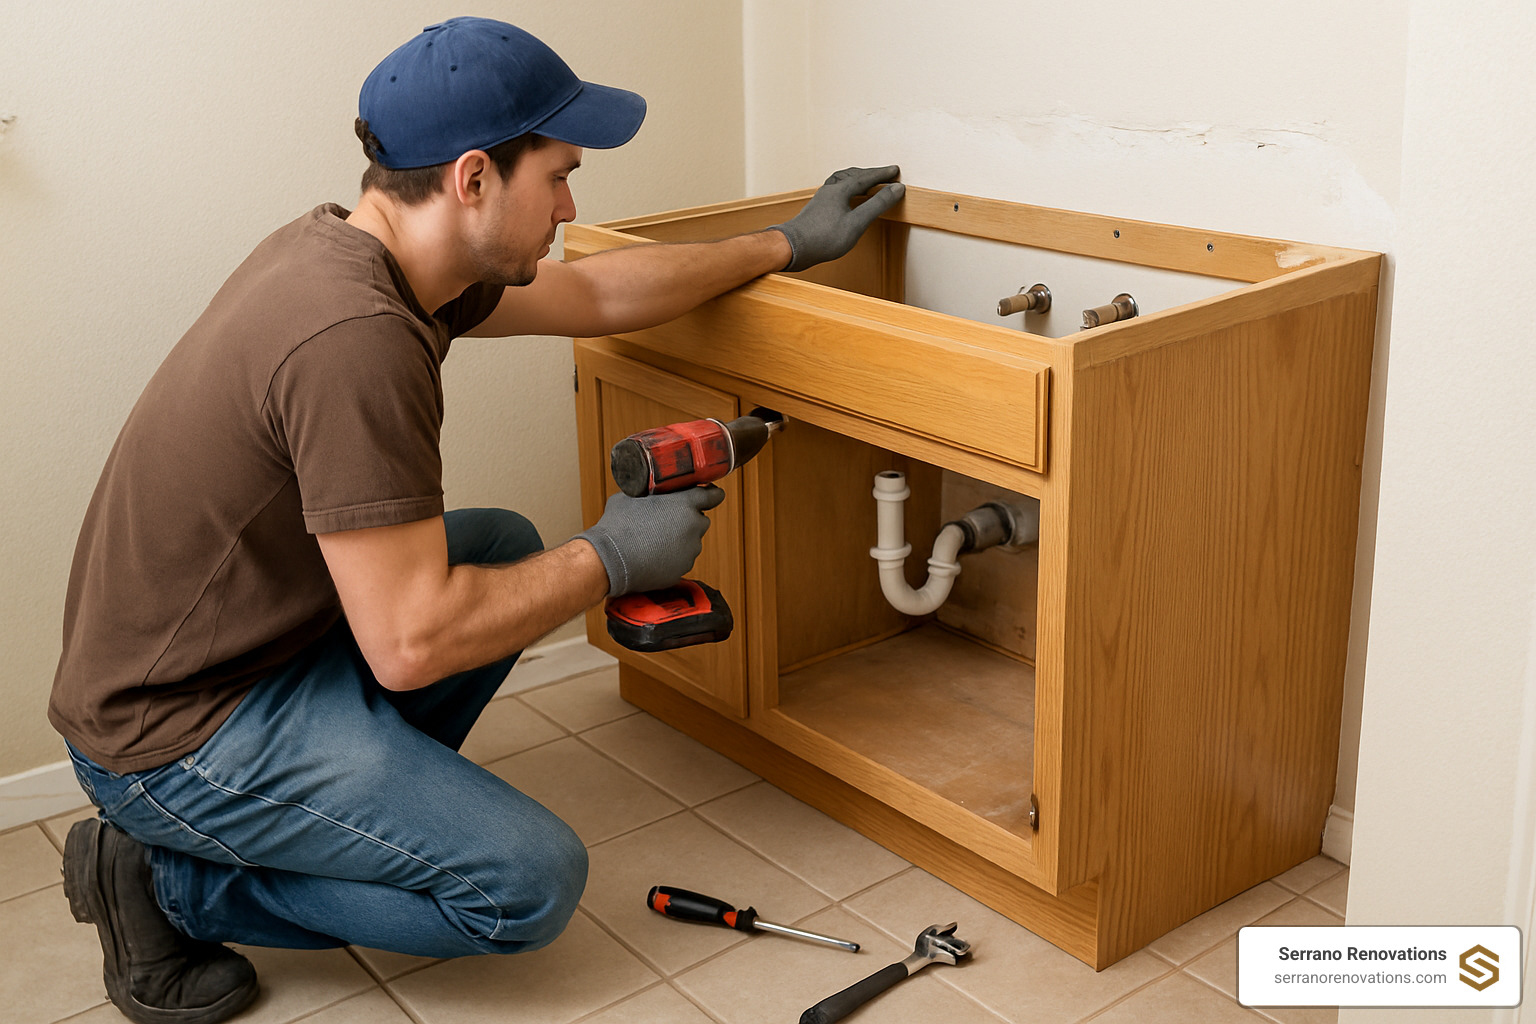
How to Securely Fasten the Vanity
With your vanity positioned and level, it’s time for the most critical safety step: securing it to the wall. An unsecured vanity isn’t just unstable – it can tip over and cause serious injury or damage your plumbing connections.
Locate those wall studs you marked earlier and align them with your vanity’s mounting points. Here’s where that prep work pays off. Pre-drill pilot holes through the vanity’s back rail and into the studs. This prevents the wood from splitting when you drive the screws – a mistake that can ruin your vanity’s finish.
Use 3-inch drywall screws to secure the vanity to the wall studs. These screws should penetrate at least 1.5 inches into the stud for a rock-solid connection. If your vanity doesn’t align perfectly with studs (it happens), use appropriate wall anchors rated for your vanity’s weight.
After securing everything, check for level one more time. The weight of the vanity and the mounting process can sometimes shift things slightly. Adjust shims if needed and trim any protruding shim material with a utility knife for a clean, professional look.
Phase 4: Installing the Top, Sink, and Plumbing
Installing the Faucet and Setting the Vanity Top
Here’s a tip that will save your back and your sanity: install your faucet on the countertop before setting it on the vanity. Trust me, trying to wrestle with faucet installation while crammed under a vanity is nobody’s idea of fun.
Start by following the manufacturer’s instructions carefully – every faucet model has its quirks. Fit the mixer seal and thread the faucet studs through the designated holes in your countertop. Install the faucet with its gasket, then secure it from underneath with the provided hardware.
Don’t fully tighten everything just yet. You’ll want to make sure the faucet is perfectly aligned before committing to the final position.
For the drain assembly, apply a ring of plumber’s putty underneath the drain ring before installing it in the sink. This creates that crucial watertight seal that prevents water from seeping where it shouldn’t. Connect the drain components exactly as the manufacturer’s instructions specify.
Before setting your vanity top, apply a thin, even bead of silicone caulk along the top edge of your vanity cabinet. This creates a proper seal between the cabinet and countertop. Carefully set the vanity top into position and press down firmly to ensure good contact with the caulk.
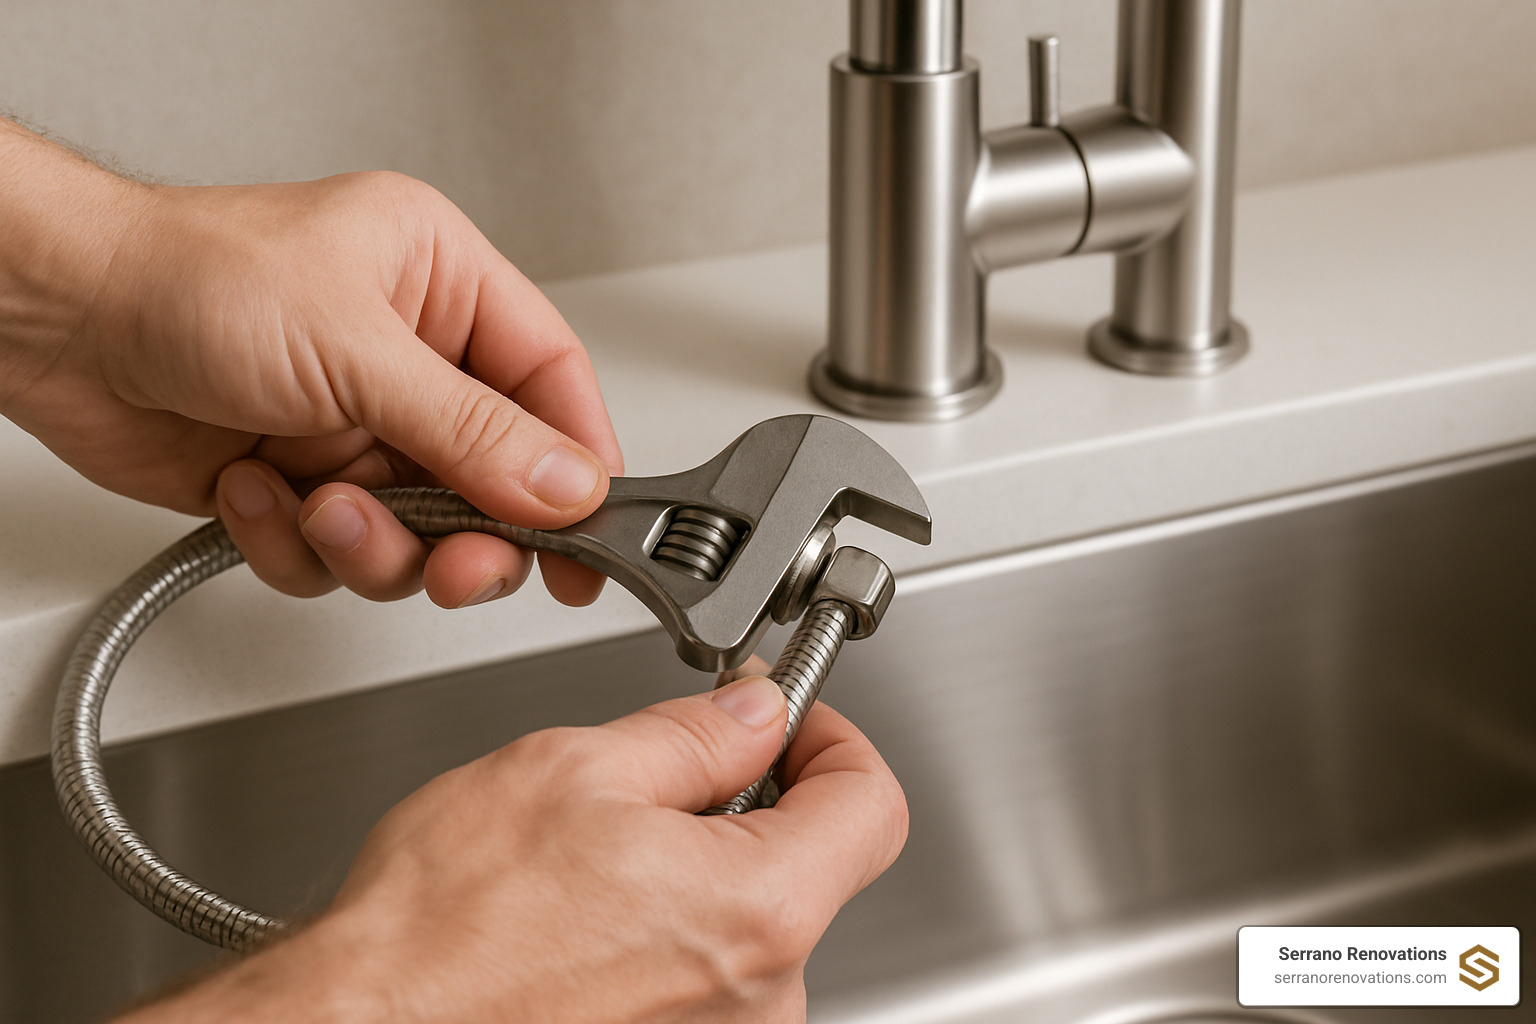
Connecting the P-Trap and Water Supply Lines
With your vanity top securely in place, it’s time to bring the plumbing back to life. Start with the water supply lines – those flexible braided lines that connect your faucet to the wall shut-off valves.
Apply plumber’s tape to the valve threads, wrapping it clockwise. This simple step prevents leaks and saves you headaches later. Connect the supply lines to the faucet first, then work your way to the shut-off valves at the wall.
Here’s the golden rule for tightening connections: hand-tighten first, then use a wrench to snug them. Over-tightening is one of the most common mistakes that can damage fittings and create bigger problems than you started with.
For the P-trap installation, connect the trap to the sink drain first, then to the wall drain pipe. If your waste pipe and drain pipe are different sizes, you’ll need an adapter to make the connection work properly. The P-trap isn’t just there for show – it holds water that prevents sewer gases from entering your bathroom.
Final Touches: Sealing and Finishing
Apply a clean bead of caulk where the vanity top meets the wall. This isn’t just about looks – it creates a finished appearance and prevents water from sneaking behind your vanity where it can cause damage over time. Use a caulk finishing tool or a gloved finger dipped in water to smooth the caulk bead into a professional-looking finish.
If you removed vanity doors during installation (smart move for easier access), now’s the time to reinstall them. Check that they open and close properly and adjust the hinges if needed.
The moment of truth: turn on the water supply slowly and check all connections for leaks. Run both hot and cold water, inspecting the supply line connections, the P-trap, and around the faucet base. If you spot any leaks, don’t panic – turn off the water and tighten the connections slightly.
For a complete bathroom upgrade, consider our Bathroom Exhaust Fan Installation service to improve ventilation and complete your bathroom vanity installation project.
DIY vs. Hiring a Pro: Making the Right Call

Understanding the Costs and Complexity
Here’s the truth about bathroom vanity installation costs – they vary wildly depending on your approach and what surprises you encounter along the way.
DIY installation typically costs between $200 and $6,000, but that’s just for materials. Your vanity choice drives most of this cost – a basic builder-grade vanity runs $200-$500, while custom or high-end units can hit $6,000 or more. The installation itself doesn’t add material costs, but it does require your time and energy.
Time investment ranges from one hour for a simple replacement to a full day when you hit complications. Most homeowners find themselves somewhere in the middle – about 4-6 hours for a straightforward installation. The skill level needed sits at beginner to intermediate, meaning you don’t need to be a master plumber, but basic tool skills help tremendously.
Professional installation changes the math completely. Basic installation for pre-assembled vanities runs $100-$200 in labor costs. However, complex installations involving plumbing modifications, structural changes, or custom work can push labor costs to $500-$1,500 or more.
According to the Remodeling Magazine’s Cost vs. Value Report, bathroom improvements consistently rank among the top home improvement investments. The total project cost often averages around $1,500 including labor, making professional installation a worthwhile investment for many homeowners.
The complexity factor often decides the DIY versus professional question. Simple vanity swaps work well for DIY projects. Complex installations with plumbing rerouting, electrical work, or structural modifications typically require professional expertise.
Common Challenges and When to Call for Help
Even confident DIYers run into situations where professional help makes the difference between success and disaster. We’ve seen too many weekend projects turn into week-long headaches when homeowners encounter these common challenges.
Unexpected plumbing issues top the list of DIY complications. Corroded or damaged supply lines that seemed fine during removal can fail during reconnection. Drain pipes that don’t align with your new vanity create immediate problems. Sometimes you need pipe rerouting or extension work that requires cutting into walls – definitely professional territory.
Structural concerns can derail your project quickly. Wall studs that don’t align with vanity mounting points require creative solutions and specialized hardware. Uneven floors needing significant leveling go beyond simple shimming. Any electrical work for vanity lighting should involve a licensed electrician for safety and code compliance.
Heavy or complex vanities present their own challenges. Double vanities requiring precise alignment test even experienced installers. Custom vanities with complex mounting systems often need specialized tools and techniques. Stone countertops require special handling to avoid cracking during installation.
At Serrano Renovations, we regularly help homeowners who started DIY projects but encountered these complications. Our Bathroom Design and Build team handles complex installations while you focus on enjoying your new space rather than troubleshooting problems.
The smart approach? Honestly assess your skills, available time, and tolerance for unexpected complications. Simple vanity swaps work great for DIY. Complex projects with multiple moving parts often benefit from professional expertise from the start.
Frequently Asked Questions about Bathroom Vanity Installation
Does a bathroom vanity need to be attached to the wall?
Yes, for safety reasons, your bathroom vanity absolutely must be attached to the wall. This isn’t just a recommendation – it’s essential for preventing serious accidents and protecting your investment.
An unsecured vanity creates a dangerous tipping hazard that could injure family members, especially children who might climb or pull on the vanity. Beyond safety concerns, a loose vanity can shift during use and damage plumbing connections by pulling pipes away from the wall.
The proper way to secure your vanity involves screwing directly into wall studs using 3-inch screws, or using heavy-duty wall anchors if studs aren’t available. This mounting provides the stability your vanity needs and ensures it stays put for years to come.
Can I install a vanity before new flooring?
It’s definitely better to install flooring first if you’re planning both projects. Think of it like building a foundation – you want that clean, continuous surface underneath your vanity.
Installing flooring before your bathroom vanity installation prevents height issues that can throw off your plumbing connections. When you install the vanity first, you’ll need to cut flooring around it later, which often looks less professional and creates potential spots where water can seep through.
However, if you’re only replacing the vanity and keeping your existing flooring, you can absolutely proceed with just the vanity installation. Many homeowners successfully update their vanities without touching the flooring.
Do vanities typically come with a faucet and sink?
This varies quite a bit depending on what you’re buying. Some vanities come as complete all-in-one units with integrated sinks and countertops, while others are just the cabinet base requiring separate purchases.
Always check the product description carefully before ordering. Most vanities include the cabinet and may include a countertop, but faucets are typically sold separately. This actually works in your favor because it lets you choose a faucet that matches your style preferences and budget.
The key is reading the fine print. Look for terms like “vanity combo,” “complete vanity set,” or “vanity top included” to understand exactly what you’re getting. When in doubt, contact the manufacturer or retailer for clarification.
Conclusion: Enjoy Your New Bathroom Oasis
Congratulations! You’ve just completed a bathroom vanity installation that will transform your daily routine and add real value to your home. There’s something incredibly satisfying about stepping back and admiring a project you’ve completed with your own hands – or watching professionals bring your vision to life.
Your new vanity isn’t just a pretty face in your bathroom. It’s increased your home’s value, created better storage solutions, and given you a space that actually makes you smile when you walk in each morning. That’s the kind of home improvement that pays dividends every single day.
The project completion represents more than just a functional upgrade. You’ve created your own bathroom oasis – a space where you can start and end each day feeling organized and refreshed. Whether you chose a sleek modern design or a classic traditional style, your bathroom now reflects your personal taste and meets your family’s needs.
For those who tackled this as a DIY project, you’ve gained valuable skills and the confidence to take on future home improvements. For those who worked with professionals, you’ve experienced what it’s like to have a renovation project completed smoothly and efficiently.
At Serrano Renovations, we know that not every homeowner has the time, tools, or desire to handle vanity installation alone. Some projects are perfect for weekend warriors, while others benefit from professional expertise. For complex installations or complete Bathroom Remodel projects, our expert team brings years of experience to homes throughout Margate, Boca Raton, Miami, Broward County, Deerfield Beach, and Delray Beach.
The beauty of home improvement lies in knowing your limits and making smart decisions about when to DIY and when to call in the pros. Whether you’re planning your next bathroom upgrade or dreaming about a complete renovation, we’re here to help you create the space you’ve always wanted – without the stress and headaches that can come with complex projects.
Your bathroom change is complete, but your home improvement journey is just beginning. Enjoy your beautiful new space!
Comments